Wednesday 27 October 2021

Bee Arty - Road Trip Folio Part 2

                                                                  Hello Bee Arty Fans

Welcome back to part 2 of my DT post using paper from  Road Trip Collection to decorate the folio we made a couple weeks ago.

Firstly we will make a pocket to go on one one side of the small envelope. 
I cut out two pieces of paper 9x10cm - I used my corner rounder on the top righthand corner that will be the base, then cut a diagonal on the top paper. 


Ink all around edges before gluing left, bottom and half right side so it makes a pocket.
Fussy cut and ink caravan and word then glue.
Put to the side while we make next piece of ephemera


This 3 pocket ephemera will go on the envelope on the left hand side (see below)
Cut a base from the collection that will leave 2mm around edges showing when glued down. 
Then cut out three rectangles 


I hold all three rectangles together and use my circle punch to punch out a opening that a tag will easily slide in and out. I also had a scrap leftover strip that I used... I inked all pieces and glued down strip and three sides of the rectangles


Next I measured and cut out 3 tags


Pick out images you want to use - ink and glue down


Glue whole piece onto front of envelope
You can also see in photo below one of the other envelopes I decorated. This was simply a piece of paper from collection I measured the same width and punched a half circle in top to make a pocket


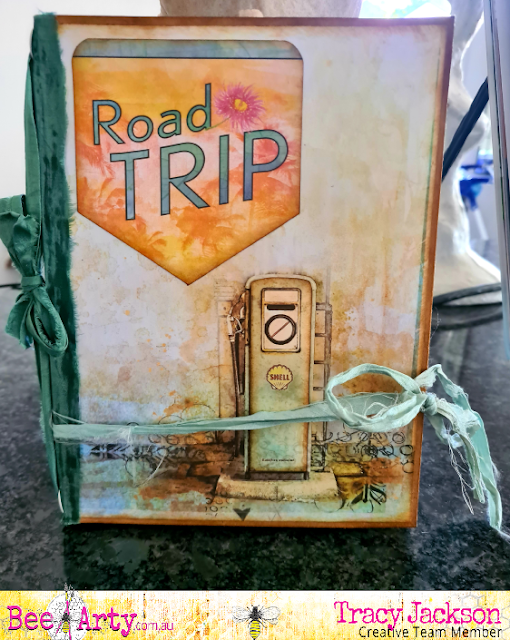
Adding a signature..... I wanted to add a signature so I glued a strip of sari silk down the outside, Once dry I punched a hole in spine about1cm top and bottom and put in an eyelet. I then threaded another piece of sari silk though both eyelets and tied in a bow on the outside.


I then prepared a signature by cutting a piece of collection paper as the signature cover and back and filled with 6 pieces of cream writing paper and folded all in half, I also used corner rounder on all signature paper I slotted under silk so it sits in like a booklet and can be replaced when needed


Below are close ups of each decorated envelopes


Front


I rally enjoyed making this folio, I hope I have inspired you to have a go.


Until next time, stay safe..
Happy crafting

Wednesday 13 October 2021

Bee Arty - Road Trip Folio Part 1

th                                                                 Hello Bee Arty Fans

Today I am starting a two part DT post making a folio from  Road Trip Collection.
In the first post we will be making the Main body using4 things - Road Trip Collection, 1 manila folder and 3 envelopes ( 2 larger ones and 1 small)
Lets get started


All manila folders will be slightly different in length and width. Mine measures 32cm across. You want to find the middle and score 1/8 on either side so this makes a small spine


Next pick out and cut 4 sheets of paper that will be the cover, 2 middles and back. 
I have cut mine so I leave about 2mmaround edges that show the folder. 


Before gluing all down ink all edges of paper and manila.
I used Art Glitter Adhesive 
Front


Middle


Back


Next ink around all edges of the envelops


Pick paper to cover envelopes and ink


First large and small envelope -  have both flaps pointing outwards (see photo), this will be for the left hand side.... IMPORTANT - glue small envelope flap on top off large envelope and glue down pre cut paper so that small flap is between the two


flip small envelope over so it sits on top of large envelope


Glue pre cut paper onto second envelope


Open manila folder up and glue flaps down on bottom edge


Use Art Glitter Adhesive to glue bottom half, then flip over and glue down.
I use an old credit card to smooth all the glue out.


Inside folio with envelopes folded in


Inside of envelopes opened out


That's part 1 of the folio done. Hope you found my instructions easy to follow. 
You are free to decorate as you please.... or wait for part two, where I will show each section decorated.

Until next time, stay safe..
Happy crafting

Wednesday 15 September 2021

Bee Arty - Laugh Card

                                                                 Hello Bee Arty Fans

Today I have a short post sharing the last card I made using the cut out from Embrace Change Collection designed by Fiona Paltridge

I picked out some cut outs that I had left over from last two cards


For this card I really wanted to use the butterflies, so wanted them more as my focal point rather than the plants

I choose the background paper and played around with composition.


Once happy I inked edges, picked out a word and glued all down.


I am excited to start my next project. Paige sent me the Road Trip Collection, and straight away I knew I wanted to make a folio with it. Because it will be a rather big project and photo heavy I will split into two posts...

Until next time, stay safe..
Happy crafting


Tuesday 14 September 2021

Faith Pocock - Princess Cabinet

                                                   Good morning Faith Pocock Fans

This for my DT project I have Princess Cabinet from  Faith Pocock Studio 

Below is how it arrived all neatly packed :-)


Bit of a dry run without glue first.


Pulled apart and covered back and shelves with some Tim Holtz paper


Picked out a paint and painted sides crown and front of the doors


Glued together using Art Glitter Adhesive
Because I wanted to store more lace inside I needed to cut some paper and place on each end so the tabs that hold the lace didn't fall out


All done.....


I stamped on door frames to add a bit of interest.

Because I didn't have any screws to screw the hinges on I drilled holes through the MDF and used some matching brads.


Slot edges into holes and glue in.... Place crown on top.... 
And all ready to add lace


Finished project!


Until next time 
Happy Crafting

Friday 10 September 2021

Tim Holtz Journal cards and tags

 Today is a prefect day to try something I rally struggle with... using Tim Holtz people.... I mean what's the point in crafting then adding some random person onto the tag/journal card??? I still really don't know... but hey at least I can say I've done it!
I have a step by step process below...

First I selected a 12x12 paper that I had no use for.... and glued down random txt from different books


Once I cut into different sized tags and journal cards I inked around the edges


I choose two distress Inks - a brown and a green, transferred ink onto a glass matt and sprayed with a little water


Then dabbed surface of tags onto wet ink
Leave to dry...


Once completely dry, I used the same coloured inks to stencil with


This was my background all done... Next I placed torn paper, labels, even stamped some numbers on... before adding the paper dolls.
Finally to finish off I sewed around the edges


Glad I have made these. They will all end up in one of my hand made journals that I sell

Until next time
Happy Crafting